
An AI model editor is where generated on-model images get their finishing touches. A background is swapped, a stray object is erased, a hand is fixed, the frame is extended for a banner, the image is upscaled for print. Editing is faster than regenerating, and most of the time it is the right call.
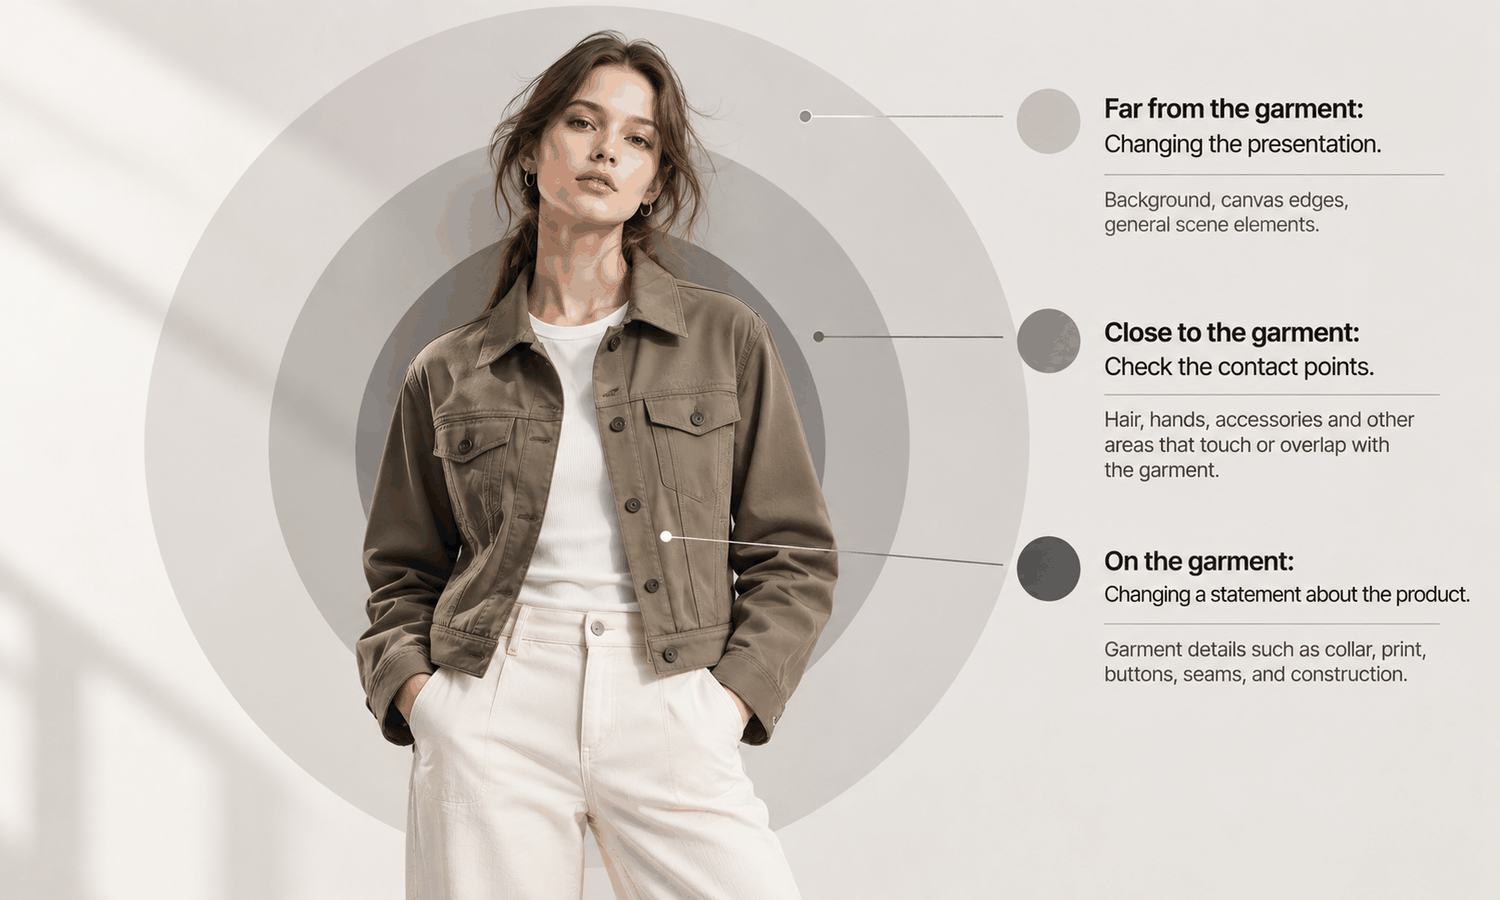
The question that decides whether an edit is safe is not how good the result looks. It is whether the edit changes what the image says about the product. An on-model image makes claims about a garment: its color, its trims, its print, its shape. Edits that stay away from the garment change the presentation. Edits that land on the garment change the claim, and a changed claim has to be true.
This article sorts common edits by where they land: away from the garment, near it and on it. It explains why location decides the risk, how to handle each group and how to set edit rules a team can follow.
| Edit | Where it lands | Risk to the garment | Check afterward |
|---|---|---|---|
| Replace or remove the background | Away from the garment | Low, at the garment's edge | The outline and any fine edges |
| Crop or extend the canvas | Away from the garment | Low | Nothing of the garment is cut off |
| Erase a stray object | Usually away | Low, unless it touches the garment | The area the object overlapped |
| Upscale for print | The whole image | Moderate, because detail is rebuilt | Trims, text and texture at full size |
| Touch up hair or face | Near the garment | Moderate at the collar | Neckline and collar |
| Fix a hand | Near the garment | Moderate at pockets and cuffs | Pockets, cuffs and hem |
| Change a trim | On the garment | High | Against the trim reference |
| Fix a print or logo | On the garment | High | Against the artwork |
| Change the garment's color | On the garment | Very high | Against the physical colorway |
| Reshape the silhouette | On the garment | Not acceptable | Do not make this edit |
Why Location Decides the Risk
When an editor changes part of an image, it does not simply paint over pixels. It regenerates the edited area so that it blends with what surrounds it. That is what lets edits blend in, and it is also why they can reach further than intended. The edge of an edited area is produced fresh, and whatever sits at that edge can shift slightly.
So the same kind of edit carries different risk depending on where it happens. Replacing a background regenerates the area around the garment's outline, which can soften a fine edge but leaves the garment's interior alone. Fixing a hand that rests on a pocket regenerates the pocket's edge along with the fingers. Changing a button regenerates the button and the fabric immediately around it.
The garment is where the customer's expectations are set. Anything an edit changes there becomes part of what the image promises. That is why the practical rule is to sort edits by location first and by appearance second.
Edits Away From the Garment
Most everyday edits happen away from the garment, and they are the safest.
-
Backgrounds. Removing or replacing a background changes the setting, not the product. Check the garment's outline afterward, especially fine edges such as fringe, frayed hems and loose threads, which a background edit can smooth away.
-
Crops and canvas extensions. Cropping for a channel and extending the canvas for text space or a print bleed change the frame. Check that nothing of the garment has been cut off and that an extended area has not added anything that looks like part of the product.
-
Erasing stray objects. A clothing tag, a pin or a piece of studio equipment left in the frame can be erased. If the object overlapped the garment, check the area it covered, because the erased region is filled with regenerated fabric.
-
Upscaling. Upscaling touches the whole image, not only the background. It rebuilds fine detail to fill the extra pixels, so trims, printed text and fabric texture can change slightly. Treat an upscaled image as a new image and check the garment's details at full size.
Away from the garment does not mean unchecked. It means the check is focused on the edges and the areas an edit could have reached.
Edits Near the Garment
Some edits target the model but sit right against the garment. Hands, hair, jewelry and the neck all meet fabric.
A hand resting on a pocket, holding a lapel or tucked into a waistband is the most common case. Fixing the hand regenerates the fabric it touches. After the edit, check the pocket's shape and position, the cuff's length and the hem's line against the garment source.
Hair that falls over a collar or a hood is the second. Touching up hair can change the collar's shape, the neckline's depth or the placket's top button. Check the neckline after any hair edit.
Jewelry and accessories sit on the boundary too. Removing an earring can reshape a collar point; adding a bag strap can press into a shoulder seam. Keep accessories consistent with the brand's styling rules, and check the garment where they meet it.
The pattern is the same in each case: edit what you meant to edit, then check the garment where the edit touched it.
Edits on the Garment
Edits that land on the garment itself change what the image claims about the product. They are sometimes necessary, and they need the most care.
Trims first. When a button, zipper pull, label or piece of hardware comes back wrong, the safest correction replaces it from a reference image of the real trim, not a freehand fix. A trim painted to look right is still a guess. After the replacement, compare it with the trim reference at full size.
Prints and logos next. Small corrections can be made against the artwork file, and the result checked against it letter by letter. When a print is wrong across a large area, editing it back into shape tends to produce a second approximation of the first. Regenerating from a better garment source usually gives a more faithful result.
Color is the edit to treat with the most caution. Recoloring a garment to match the product, or to create another colorway, shows what the garment might look like, not what it does look like. Screen color is not a physical reference, generated imagery does not promise an exact color-code match and the colorway is settled by the lab dip or sample. If the garment's color is wrong, the answer is a better garment source, checked against the physical colorway, rather than a recolor.
Some edits should not be made at all. Reshaping the silhouette, smoothing folds that belong to the fabric or changing how the garment sits on the body alters the product being shown. The image should show the garment as it is.
When a garment has several problems, stop editing. Layered corrections carry forward whatever the earlier edits changed, and each edit adds another reconstruction. Go back to the garment source, place the garment on the model again and check the new image from the start.
Record every edit that touched the garment: what was changed, from which reference and who approved it. If a question comes up later, the answer is in the record.
Setting Edit Rules for the Team
A short set of rules keeps editing consistent across producers. Allow edits away from the garment as part of normal production, with an edge check. Allow edits near the garment, with a check of the contact points. Require a reference and a named approver for any edit on the garment. Prohibit silhouette and color edits used to represent the product. Check every final image against its garment source, without exception, since images produced from the same settings tend to repeat the same mistake.
Some styles remain better photographed than edited: complex prints, lace and openwork, sheer fabrics and layered styling are current weak areas for generated imagery. Route them to photography rather than editing toward an acceptable result.
In Lightchain AI (apparel AI), the editing tools map onto these rules.
-
The Image Editor covers edits away from the garment: background removal, smart cutout, smart cropping, AI Image Expansion, AI Eraser and Upscale, with Partial Edit for small local changes.
-
Target Revision replaces an element in a defined area using a reference image, which suits trim corrections made from a real trim reference.
-
When a garment has drifted too far to edit, AI Virtual Try-On places it on the model again from its flat-lay, giving the review a clean start.
For teams refining generated imagery with precise, local edits, Partial Redraw is the Lightchain AI solution built for that work.
Frequently Asked Questions
What makes an edit safe for the garment?
Where it lands. Edits away from the garment change the presentation, edits near it can disturb the contact points and edits on it change what the image claims about the product. Check each accordingly.
Is upscaling a safe edit?
It is useful, but it touches the whole image and rebuilds fine detail. Check trims, printed text and fabric texture at full size after upscaling.
How should a wrong trim be fixed?
Replace it from a reference image of the real trim rather than painting a fix, then compare the result with the reference at full size. If several trims are wrong, regenerate from a better garment source.
Can a garment be recolored to create another colorway?
Not for product images. A recolor shows what the garment might look like in another color, not the real colorway. Use a garment source of that colorway and check it against the physical sample.
When should we stop editing and regenerate?
When a garment has several problems, or when a print is wrong across a large area. Layered edits carry earlier changes forward, so going back to the garment source gives a cleaner result.
Which edits should never be made?
Reshaping the silhouette, smoothing folds that belong to the fabric or changing how the garment sits on the body. Those alter the product being shown.
Which Lightchain AI solution supports safe editing?
Partial Redraw is the one to use. It brings together Image Editor tools for edits away from the garment and Target Revision for replacing a trim in a defined area from a reference image, with AI Virtual Try-On available when a garment needs to be placed again from its flat-lay.
In Closing
An AI model editor is safe to use freely away from the garment and carefully near it. On the garment, every edit becomes a claim about the product. Replace trims from real references, correct prints against artwork, fix color at the source rather than by recoloring and never reshape the garment. When the problems multiply, go back to the garment source instead of layering fixes. Record what was changed, and check every final image against its source.
Start Here
If your team refines generated on-model images and wants edits that improve the picture without changing the product, Partial Redraw is the solution to use. It is built for precise, local refinement: you adjust backgrounds, hands and details, replace a trim in a defined area from a reference image and keep the rest of the image as it was. Start with one batch, sort its edits by where they land, and check every garment edit against its reference.
**Explore Partial Redraw → **https://www.lightchainai.com/global/solutions/partialRedraw